How to Create a Client Portal in Stackby Using Interfaces (Step-by-Step Guide)
Learn how to build a professional client portal in Stackby using Interfaces. Manage your client database, share updates, and impress clients — no coding needed.
What Is a Client Portal — and Why Your Agency Needs One
A client portal is a secure, shared workspace where clients log in and see exactly what's happening with their projects. No more "can you resend that file?" emails. No more status calls that could've been a shared dashboard. That's the core idea, and it's deceptively simple.
More formally, a portal gives external users controlled access to relevant data, documents, and updates without ever touching your internal tools. Clients see what you want them to see. Nothing more.
Agencies feel this particular pain acutely. You're juggling multiple clients, each expecting real-time visibility on deliverables, invoices, and timelines. Without a dedicated solution, teams spend hours each week forwarding files, fielding update requests, and manually building status reports. That's billable time going straight out the window.
A well-built customer portal solves several problems at once:
- Centralized communication — one place for updates, feedback, and files
- File sharing with context — documents attached directly to relevant projects
- Project visibility — clients track progress without pinging your team every day
- Professionalism — a branded, organized experience builds trust fast
Agencies that resist building one usually have the same objection: "We don't have budget for dedicated portal software." That's exactly where Stackby becomes an interesting answer.
Why Stackby Is the Ideal Platform for Building a Client Portal
Dedicated tools like client-portal.io or SimplePractice work fine for specific verticals, but they're rigid. You're locked into whatever fields and views the product was designed around. Customization either doesn't exist or costs more than the base plan.
Stackby takes a different approach. It's an AI database and app creator platform that lets you build the exact portal your clients need — not a generic approximation of one. You control the data structure, the interface, the branding, and the access levels. That flexibility is the whole point.
The Interfaces feature is the piece that makes it work. Interfaces let you layer a clean, client-friendly view on top of your internal database. Your team works in the full stack. Clients see only the polished, relevant slice you've configured for them.
For agencies specifically, this matters in concrete ways. A marketing agency managing campaign assets needs completely different portal views than a legal team tracking document review cycles. The platform handles both without requiring a second subscription.
One honest note: this isn't about replacing your CRM or project management tool. Think of it as the delivery layer that sits between your internal data and your clients. That framing makes the setup decisions much clearer.
Step 1 — Set Up Your Client Database in Stackby
Before you can build any portal view, you need clean data underneath it. In Stackby, that means setting up your stacks and tables with the right structure from the start.
Here's the core table setup most agencies need:
| Table | Key Fields | Purpose |
|---|---|---|
| Clients | Name, Contact, Industry, Status | Central record for each client |
| Projects | Project Name, Client (linked), Status, Deadline | Track active and completed work |
| Deliverables | Title, Project (linked), Due Date, File, Stage | Granular task or asset tracking |
| Invoices | Invoice No., Client (linked), Amount, Status, Due Date | Financial visibility for clients |
The linked records are what make this worth doing correctly. Linking your Projects table to your Clients table lets you pull related records dynamically. When a client logs in and sees their active projects, that list is automatically filtered to show only their work. No configuration required every time you add a new project.
A few field type tips worth following:
- Select fields for statuses (Draft, In Review, Approved, Delivered) so clients can visually scan progress
- Attachment fields for deliverables and documents
- Date fields with deadline tracking for project timelines
- Formula fields to auto-calculate days remaining until a deadline
Getting the client database right here saves you hours of cleanup later. Dump data in without structure and you'll spend time untangling it before any interface makes sense.
Step 2 — Build the Client Portal with Stackby Interfaces
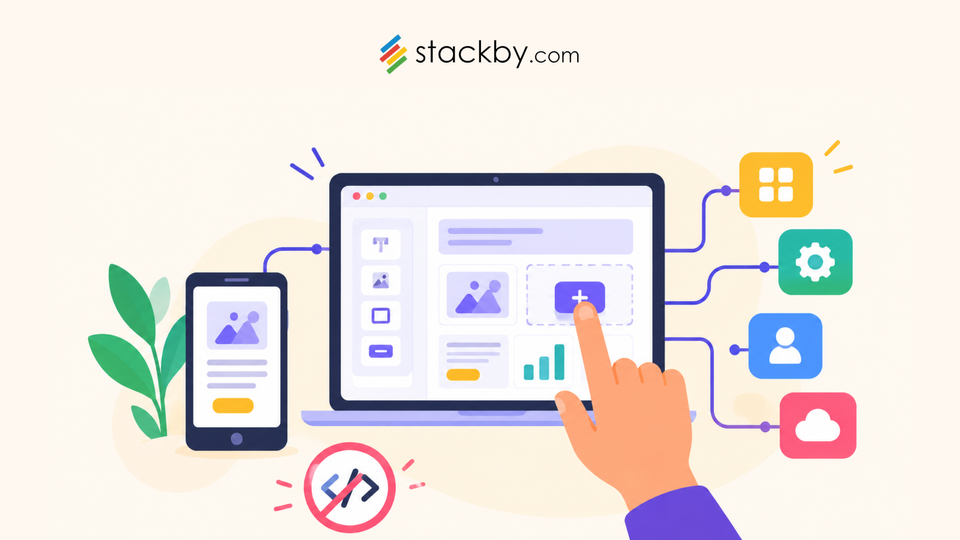
This is the core of it. Stackby Interfaces are configurable dashboards that pull from your underlying tables and surface them as a polished, navigable view.
Think of an Interface as the front door. Behind it, all your relational data lives in tables. In front, clients see a clean dashboard with exactly the information relevant to them.
How to create an Interface step-by-step:
- Open your stack and click Interfaces in the left navigation panel
- Click Create Interface and give it a name (e.g., "Acme Corp Portal")
- Choose a layout — start with a blank canvas or pick an available template
- Add blocks to the canvas. The main block types you'll use are:
- Table block — shows filtered rows from any table
- Form block — lets clients submit requests or feedback
- Chart block — visualizes project or budget data
- Gallery block — displays deliverables as visual cards
- For each block, configure the data source, apply filters (e.g., only show rows where Client = "Acme Corp"), and choose which columns are visible
- Arrange blocks by dragging and resizing directly on the canvas
The filter step is non-negotiable. Without per-block filters tied to a specific client, every client sees every other client's data. Test this by opening your shared link in an incognito browser before you send it anywhere.
A good starting layout for most agencies:
- Top row: A chart block showing project count by status
- Middle section: Active deliverables table with status indicators
- Bottom section: A form block for client feedback or new requests
First-time configuration takes about 30-45 minutes. Once you've done it once, duplicating the setup for a new client takes under 10.
Step 3 — Control Access, Branding, and Sharing Settings
A portal that looks like a raw database link won't impress anyone. This step is about making the experience feel intentional and professional.
Sharing options:
You can share an Interface via a public link or embed it in a client-facing webpage. For most agencies, a public link with password protection is sufficient. Clients click, enter a password, and land on their portal. Clean and simple.
Permission levels determine what clients can actually do:
- View-only — clients see data but can't change anything. Best for reporting dashboards and deliverable tracking.
- Form submission — clients can submit new entries through form blocks, but can't modify existing records. This is the right level for most agency setups.
Branding:
You can add your agency logo and customize colors within the Interface. Here's an opinion worth taking: for high-value clients, consider using their branding rather than yours. Make the portal feel like it belongs to them. That detail does more for the relationship than most people expect.
The iframe embed option works well if you're integrating the portal into a client's own website or intranet. It keeps things clean without external branding bleeding through.
Step 4 — Creating a Client Portal with AI in Stackby
This is where managing multiple portals at scale becomes genuinely manageable rather than just theoretically possible.
Stackby includes AI columns that let you run AI-powered operations directly on your table data. For portal management, this means real time savings across three areas:
Auto-summarizing project status: Add an AI column to your Projects table with a prompt like "Summarize the current project status based on deliverables and notes." Clients see a plain-English summary without anyone writing it manually. The column updates when the underlying data changes.
AI-generated project descriptions: When you create a new project, an AI column can auto-generate a client-friendly description from your internal notes. No more manually translating internal jargon into client-readable language.
AI-assisted data entry: AI columns can auto-categorize deliverables, suggest due dates, or flag items that look overdue based on the project timeline. It's the kind of low-level administrative work that eats into your team's day.
Creating a client portal with AI isn't about replacing your team's judgment. It's about removing repetitive, low-value writing tasks so your team can focus on actual work. If you're managing portals for 10 or 15 clients, that distinction matters a lot.
Agency Client Portal Use Cases and Templates
Different agency types have different portal needs. Here's how the setup maps to real-world scenarios:
Marketing agency deliverables tracker: Tables for campaigns, ad creatives, and copy deliverables. The Interface shows current sprint status, upcoming deadlines, and a form block for requesting revisions. Clients see what's approved and what's still in review, without a single status call.
Design agency asset approval portal: Gallery view for visual deliverables. Clients scan assets and submit approvals or revision notes through a form block. This replaces long email chains with a structured review cycle that both sides can refer back to.
Consulting client reporting dashboard: Chart blocks showing KPIs alongside a table of completed and upcoming deliverables. Clients get a clear picture of value without scheduling a formal review call every week.
Legal client document portal: A file-heavy Interface where clients access contracts, NDAs, and case documents. View-only permissions with password protection are essential here. The database structure keeps each matter correctly linked to the right client record.
Each of these agency client portal configurations starts from the same foundation you set up in Steps 1 through 3. The difference is which blocks you feature prominently and how tightly you filter the data.
Pre-built templates are available for most of these workflows. If you're starting fresh, using a template and customizing from there is meaningfully faster than building from scratch.
Best Practices for Managing and Scaling Your Customer Portal
Building the portal is one thing. Keeping it useful is the ongoing work.
Keep data current. A customer portal where status is two weeks out of date is worse than no portal at all. Set a team norm: every update happens in the platform, not in Slack or a side email thread. The portal is only as good as the data driving it.
Notify clients of updates. Set up automations that alert clients when a deliverable moves to "Ready for Review" or an invoice gets added. Clients shouldn't have to log in and hunt for changes. Push the information to them.
Archive old projects. Cluttered portals confuse clients. When a project wraps up, move it to an "Archived" status and filter it out of the active view. Keep the portal focused on what's live right now.
Duplicate templates for new clients. Once you've built one well-configured Interface, don't start from scratch for the next client. Duplicate it, update the filter, swap the branding. You're done in under 15 minutes.
Solve for client adoption early. The biggest implementation challenge isn't technical. It's getting clients to actually use the portal instead of emailing you. Walk them through it on an onboarding call. Make it the only place you post project updates for the first few weeks. Habits form quickly with consistent reinforcement.
Frequently Asked Questions About Client Portals in Stackby
Can clients edit data in a Stackby portal?
That depends entirely on how you configure the Interface. View-only permissions prevent any edits. If you include a form block, clients can submit new entries but can't modify existing records. Full editing access is technically possible but isn't recommended for most agency portal setups where you want to control the data quality.
Is Stackby secure for client data?
Yes. The platform uses encryption for data in transit and at rest. Shared Interface links can be password-protected, and you control exactly which data is exposed in each portal view. For sensitive information, combine password protection with view-only permissions and keep attachment fields restricted to approved file types.
Can I create multiple portals for different clients?
Absolutely. You can create a separate Interface for each client within the same stack. Each one has its own filters, layout, and branding settings. There's no hard limit on the number of Interfaces you can build, which makes scaling to a larger client roster straightforward.
Does Stackby have a client portal template?
Yes. Pre-built templates cover agency and client management workflows. Start with a template, customize the table structure and Interface layout, adjust the sharing settings, and you're up and running faster than building from zero.
How is Stackby different from dedicated client portal software?
Dedicated tools are designed for one purpose and one workflow. Stackby is a flexible database and app platform you shape around your own process. More setup upfront, yes — but the result is a portal that fits your agency exactly, rather than one that forces you to adapt your workflow to someone else's product decisions.
What happens if a client accidentally sees data they shouldn't?
This is why filter configuration in Step 2 matters so much. If you've correctly set filters on every block to show only data linked to that specific client, cross-contamination isn't possible by design. Always test your Interface by opening the shared link in an incognito browser before sending it to anyone. This takes two minutes and has saved agencies from embarrassing mistakes.
Conclusion
Building a client portal in Stackby follows a clear, repeatable path: set up a solid database with properly linked tables, build a clean Interface with filtered blocks, configure access and branding, then layer in AI columns to cut down on ongoing maintenance.
The result is a professional portal that gives clients genuine visibility into their projects and runs entirely on data your team is already managing. No separate subscription for portal software. No rigid templates that force you to adapt your workflow.
Key Takeaways:
- A client portal reduces email volume and builds client trust through structured transparency
- Stackby's Interfaces feature lets you build a portal directly on top of your existing database, with no code required
- The database structure (Clients, Projects, Deliverables, Invoices with linked records) is the foundation everything else depends on
- AI columns automate status summaries and project descriptions, reducing the ongoing maintenance burden significantly
- Multiple portals for different clients are fully supported, each with independent layouts, branding, and access settings
- Client adoption is the hardest part — solve it with a brief onboarding call and consistent use of the portal from day one
If you haven't started yet, Stackby's free trial is the fastest way to find out whether this approach fits your agency. Set up the basic table structure, build one Interface, share it with one willing client. You'll know within a week whether it actually cuts down on those "any update?" emails.